ENGINE DISASSEMBLY/ASSEMBLY [MZ-CD 1.6 (Y6)]
B3E011002000W04
1. Remove the vacuum pump. (See VACUUM PUMP REMOVAL/INSTALLATION [MZ-CD 1.6 (Y6)].)
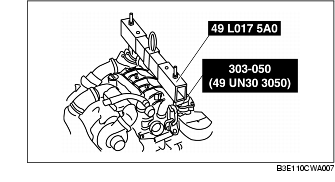
2. Using the bolt part number 99794 0825 or M8×1.25, length 25 mm {0.98 in} to install the SST to the position shown in the figure.

3. Hang the engine and transaxle using the SST, and then take it down from the engine jack.
4. Remove following parts:
- (1) Vacuum chamber
- (2) Starter (See STARTER REMOVAL/INSTALLATION [MZ-CD 1.6 (Y6)].)
- (3) Joint shaft (See JOINT SHAFT REMOVAL/INSTALLATION [MZ-CD 1.6 (Y6)].)
- (4) Transaxle (See MANUAL TRANSAXLE REMOVAL/INSTALLATION [J65M-R].)
- (5) Pressure plate and clutch disc (See CLUTCH UNIT REMOVAL/INSTALLATION [J65M-R].)
- (6) Catalytic converter, turbocharger and exhaust manifold (See EXHAUST SYSTEM REMOVAL/INSTALLATION [MZ-CD 1.6 (Y6)].)
- (7) Oil filter
- (8) Oil pressure switch (See OIL PRESSURE INSPECTION [MZ-CD 1.6 (Y6)].)
- (9) Fuel hose (See FUEL HOSE REMOVAL/INSTALLATION [MZ-CD 1.6 (Y6)].)
- (10) Water bypass hose
- (11) EGR tube and EGR valve (See EGR VALVE REMOVAL/INSTALLATION [MZ-CD 1.6 (Y6)].)
- (12) Drive belt (A/C non-equipped vehicle) (See DRIVE BELT REPLACEMENT [MZ-CD 1.6 (Y6)].)
- (13) Generator (A/C non-equipped vehicle) (See GENERATOR REMOVAL/INSTALLATION [MZ-CD 1.6 (Y6)].)
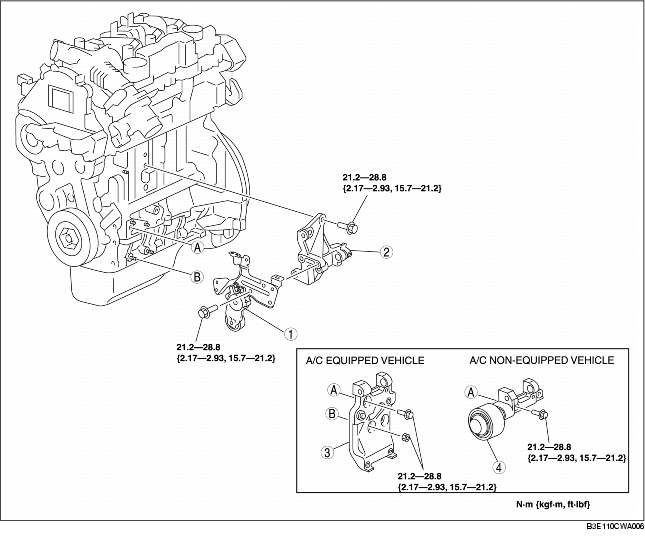
5. Remove in the order indicated in the table.
6. Install in the reverse order of removal.
|
1
|
Drive belt auto tensioner (A/C non-equipped vehicle)
|
|
2
|
Generator bracket
|
|
3
|
A/C compressor bracket (A/C equipped vehicle)
|
|
4
|
Drive belt idler pulley (A/C non-equipped vehicle)
|